This February, we’re celebrating National Bird-Feeding Month on The Greenway, and it’s the perfect time to give a little extra love to our feathered friends. Did you know that during the winter, even birds need a helping hand to make it through the colder weeks? With natural food sources like berries and seed heads running low, a simple birdfeeder filled with seed can go a long way in supporting our native bird populations as they wait for the warmer days of spring.
To join in the spirit of National Bird-Feeding Month on The Greenway, we’ve put together a fun, family-friendly activity that’s easy and rewarding. If you’re looking for a quick and simple way to help out our local birds, this DIY birdfeeder requires just two ingredients and is a great way to spread the joy of the season. Just keep reading for the step-by-step instructions!
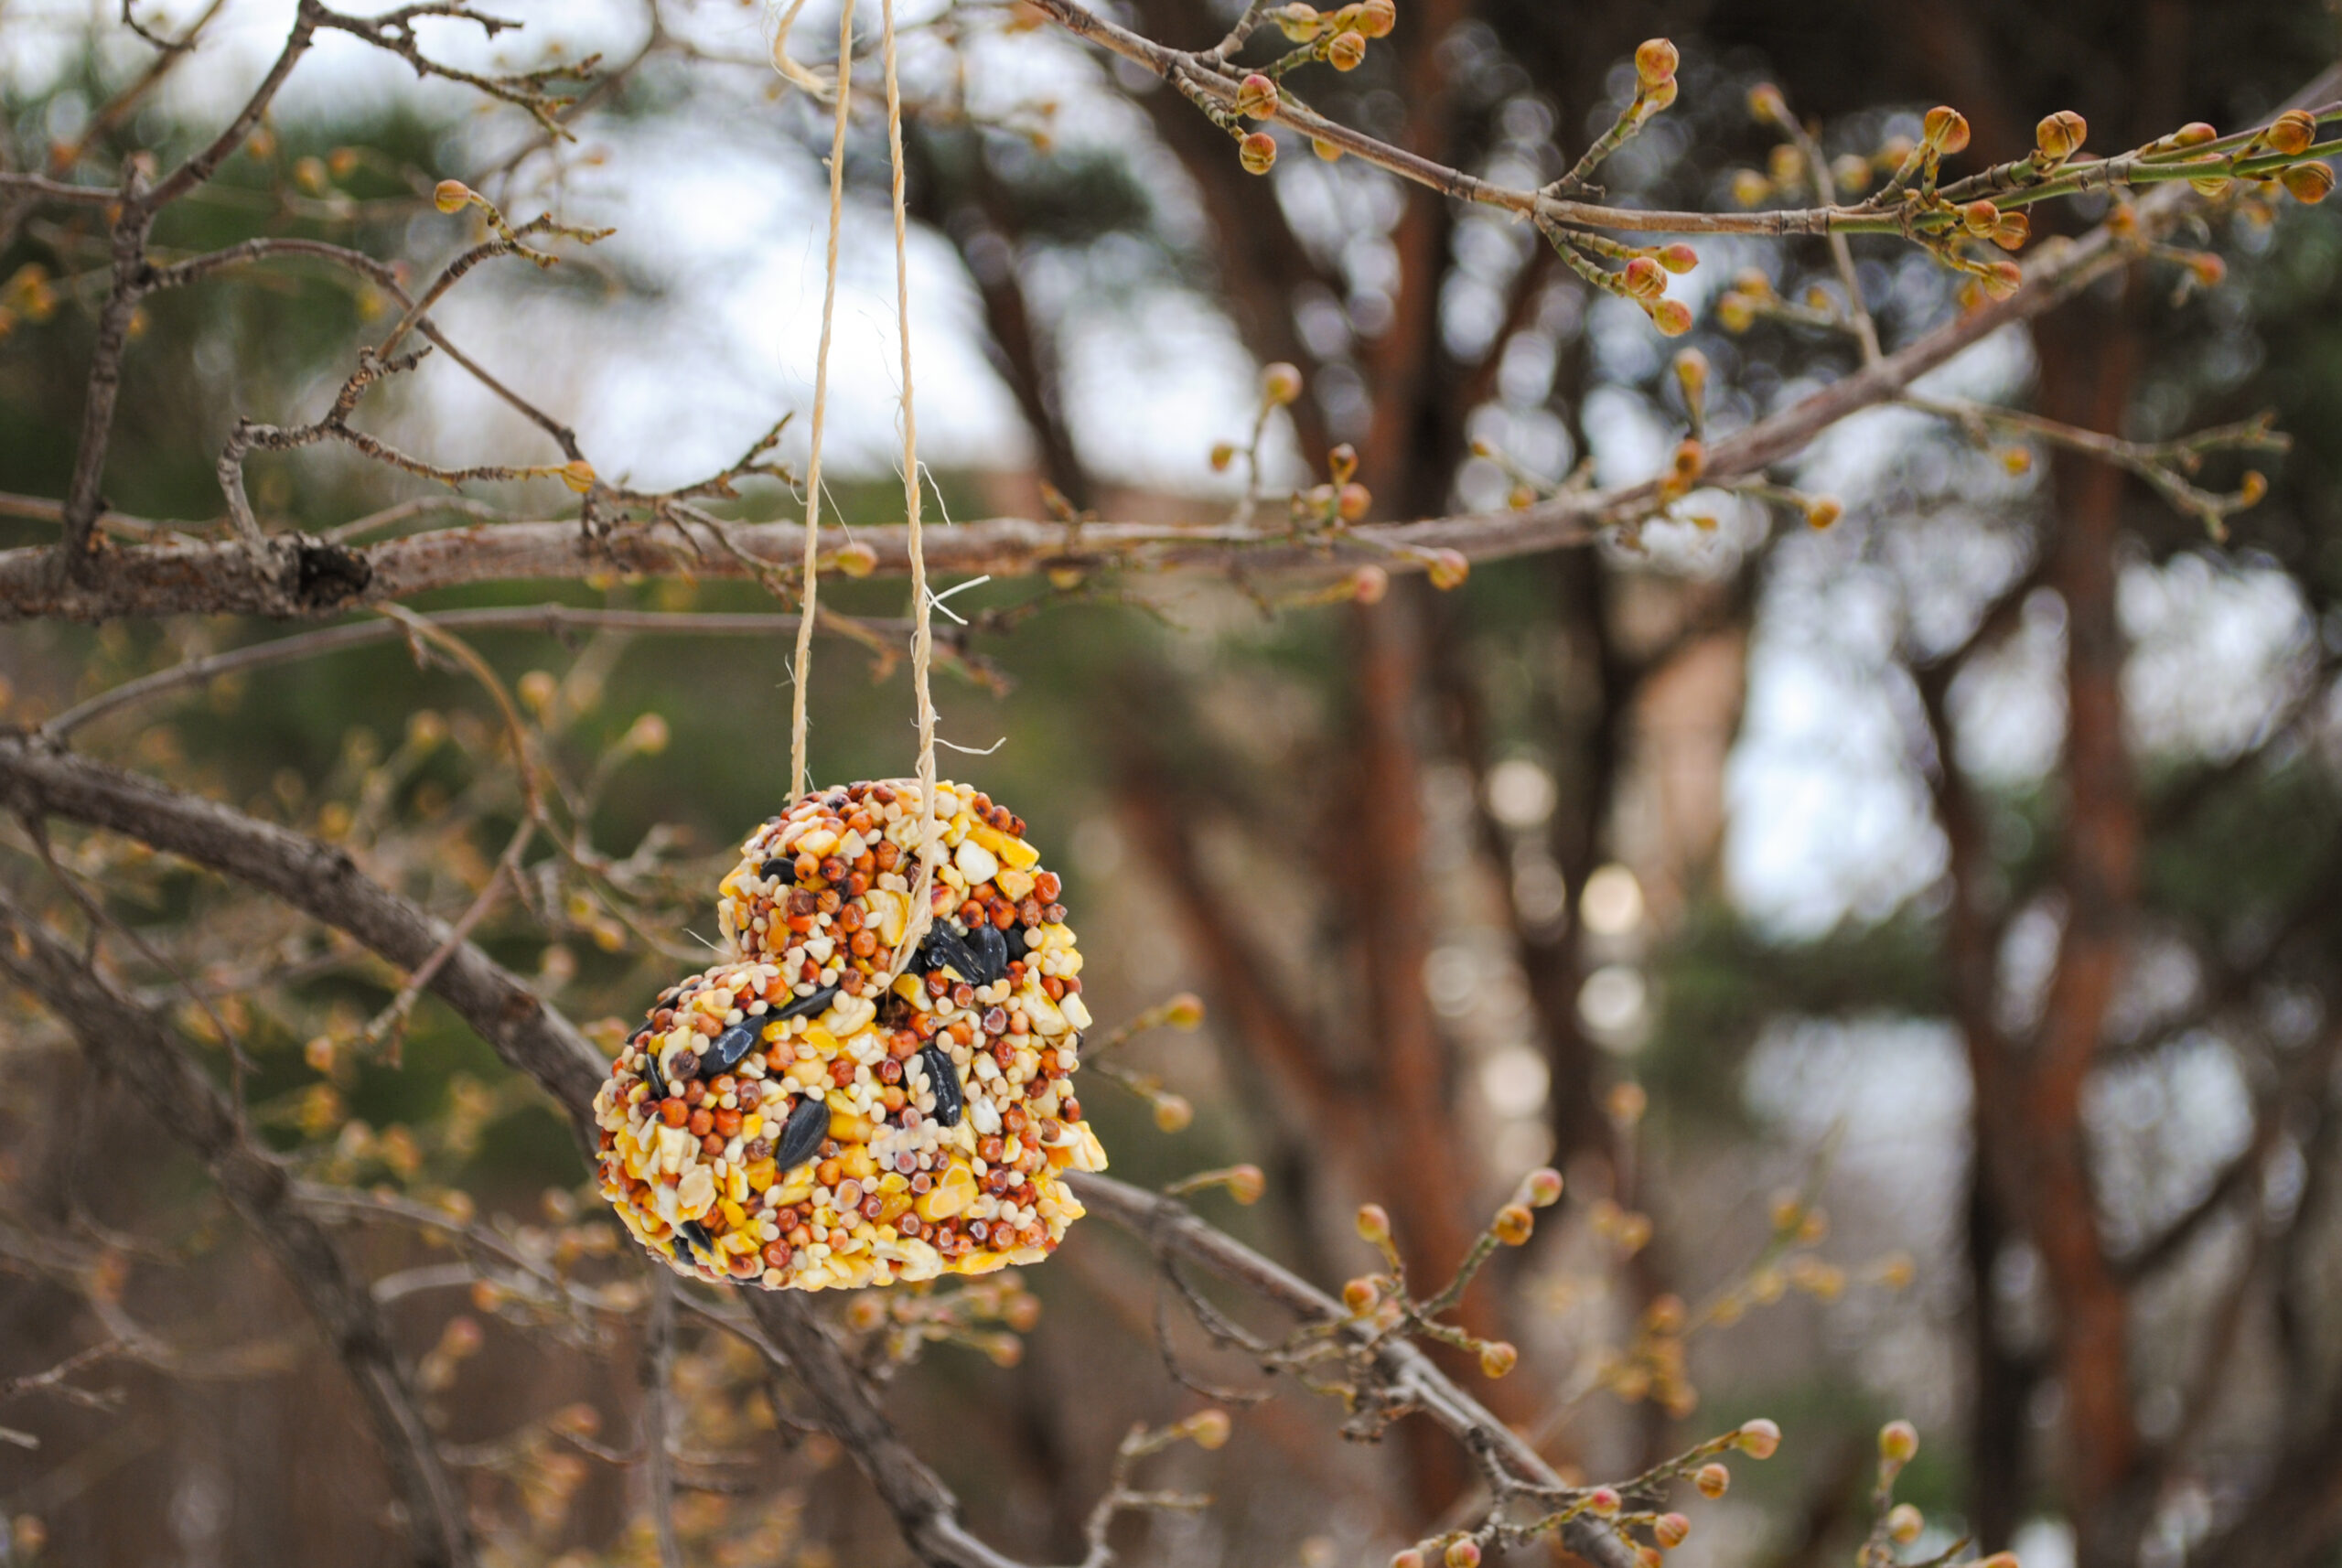
DIY Bird Feeder
Time required: 5 minutes hands-on, 30 minutes in refrigerator (depending on size of mold)
Materials needed:
- Birdseed
- Coconut oil or other bird-friendly fat (like tallow)
- Microwave-safe bowl
- Cookie cutter or other shape to use as a mold
- Straw or other object to create a hole
- Twine or durable string
Instructions:
- First, melt a small amount of coconut oil in a heat-safe bowl in a microwave (or in a pot on the stove).
- Add your melted oil to your birdseed. Many of the “recipes” we found online referenced 1 Tablespoon of coconut oil or suet for each cup of birdseed, but you may need to adjust depending on the type of seed mix you’re using.
- Using a cookie cutter as a mold on a small plate or tray, add the birdseed mixture to the shape. Don’t have a cookie cutter nearby? You can also use other shapes found in your kitchen. We also tried this using a shallow bowl and a jar lid and both worked beautifully.
- Next, before it’s completely solidified, you can make a small hole toward the center of the mass. Using this hole, you can thread a string to hang your bird feeder. Be sure to press the seed mixture firmly into the mold to ensure it forms a solid mass as it cools.
- Transfer your cookie cutter mold to a refrigerator or other cool protected space, and allow your birdseed mixture to harden.
- Next, remove the straw from your birdseed shape, and with care, remove the birdseeds from your mold. Occasionally, some seeds will crumble away, but don’t worry. You can always scatter them in your yard!
- Finally, string your twine or other thread through the hole you created taking care to handle the feeder with care.
- Display your birdseed ornament from a nearby branch, and enjoy watching your feathered friends snack away!
Click here to download the printable PDF instructions!
Image credit: Greenway Staff